VBA Height Property of CheckBox ActiveX Control in Excel to sets or gets the distance between the Height of the CheckBox control and the Height of the userform or worksheet in points. In other words we use ‘Height’ property of Check Box to set the Check Box Height position.
CheckBox_Height_Property – Syntax
Please find the below syntax of CheckBox_Height_Property in Excel VBA.
CheckBoxName.Height=Height position in number format
Where CheckBoxName represents the CheckBox object. In the above syntax we are using a Height_property of CheckBox object to set the Height position.
CheckBox_Height_Property – Explanation & Example
Here is the example for CheckBox_Height_Property. It will take you through how to set Height property of Check Box using Excel VBA. Here you can find or see how we sets or gets Height property of Check Box manually or using code.
CheckBox_Height_Property: Change Manually
Please find the following details how we are changing manually Height_property of CheckBox .
-
- Go To Developer Tab and then click Visual Basic from the Code or Press Alt+F11.
- Go To Insert Menu, Click UserForm. Please find the screenshot for the same.
-
- Drag a CheckBox on the Userform from the Toolbox.
-
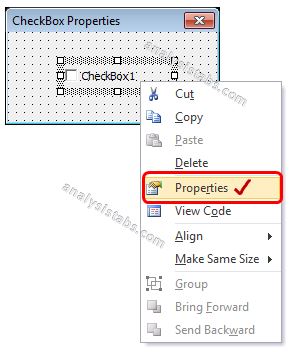
- Right click on the Check Box. Click on properties from the available list.
-
- Now you can find the properties window of CheckBox on the screen. Please find the screenshot for the same.
-
- On the left side find ‘Height’ property from the available Check Box properties.
- On the right side you can mention Height position in number format. Here is the screen shot.
-
- for better understand added two checkBox controls.
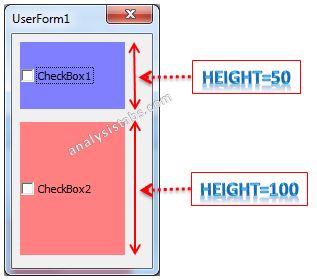
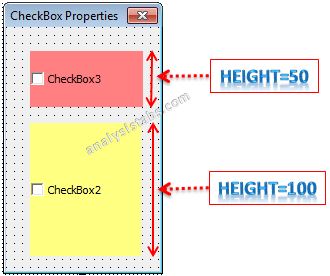
- For example, I have entered 50(number) for CheckBox1 and 100 for CheckBox2. You can see same in the screen shot for your understand.
CheckBox_Height_Property: Change Using Code
Please find the following details how we are changing Height_property of the CheckBox property with using Excel VBA code.
-
-
- Go To Developer Tab and then click Visual Basic from the Code or Press Alt+F11.
- Go To Insert Menu, Click UserForm. Please find the screenshot for the same.
-
-
-
- Drag a CheckBox on the Userform from the Toolbox. Please find the screenshot for the same.
-
-
-
- Double Click on the UserForm, and select the Userform event as shown in the below screen shot.
-
-
-
- Now can see the following code in the module.
-
Private Sub UserForm_Initialize()

End Sub
-
-
- Now, add the following example code1 to the in between above event procedure.
-
Example Code1:
'Height_Property of CheckBox Control
Private Sub UserForm_Initialize()
    With UserForm1
        'Below statement represents height_of_the CheckBox
        .CheckBox1.Height = 50
        .CheckBox2.Height = 100
    End With
End Sub
-
-
- Now, Press ‘F5’ to see the following Output.
-
Output: If Height =50 and Height=100
Please find the below output when we sets height_property of Checkbox1 value is 50 and Checkbox2 value is 100. It is shown in the following Screen Shot.


How do I increase the size of a checkbox only and not a box around checkbox in Excel 2016
this just changes the text box around the checkbox. How to change the checkbox itself?