Installation of Excel Add-in is very easy. You need to place the Add-in in a Folder and then you need to load the add-in onto Excel first time.
Follow the below Steps to download and Install Excel Add-in:
Step 1: Download Add-in
Download Add-in from Our Website: ANALYSISTABS.COM. If you have already downloaded our Add-in, please ignore this Step. Other-wise download the Add-in from our website.
Step 2: Move the Add-in into Add-ins Folder (recommended) or Desired location
You can move the files from the downloads folder to required folder where you want to store the Add-in.
Below is the recommended location to store the Add-ins:
Windows 7: C:Users<user name>AppDataRoamingMicrosoftAddIns
Windows XP: C:Documents and Settings<user name>Application DataMicrosoftAddIns
This path may be changed based on your installation preferences.
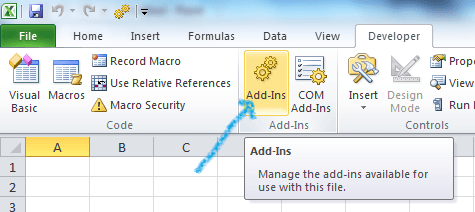
Step 3: Load the Add-in into Excel
» Open the Add-In Manager in Excel (Developer Tab) or Press Alt+t then i:
» Now you can see Add-Ins Manager:
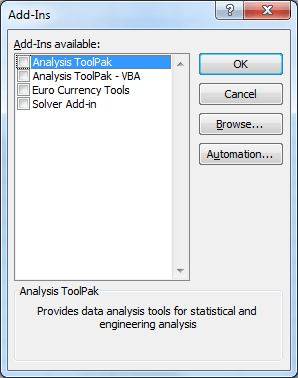
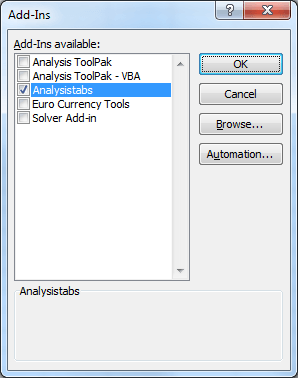
» Click on the Browse… Button. And Browse the folder where you placed and Open Add-in:
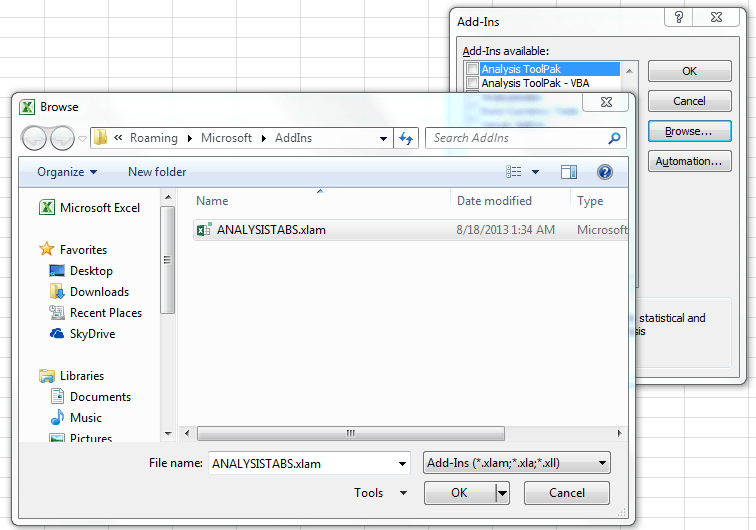
» Now you should see the Analysistabs in Add-ins list:
» And a new Tab (ANALYSIS TABS) Added to your Excel Ribbon (Menu):

Download was easy and had well-documented instructions.
I am looking forward to investigating this new tool.
Thanks Pat!
Sure, we are working on a new version, we will surprise in couple of weeks.
Thanks-PNRao!
i download it but it is not working something is is wrong in macros or so can you tell me how to fix it ?
Sometime this year this add-on disappeared from my tab. In order to use it I have to re-install it every time. When I check for update it says it’s coming. Has this problem been addressed?
Hi Eve,
Sorry. We are working on Excel VBA tutorials. It will take some time to update addin.
Regards-Valli
Private Sub CmdClose_Click()
If CmdClose.Caption = “Close” Then
Unload Me
Else
CmdClose.Caption = “Close”
CmdNew.Enabled = True
CmdDelete.Enabled = True
End If
End Sub
—————–
Private Sub cmdSave_Click()
If Trim(txtEmpNo.Text) = ” Then
MsgBox “Enter Emp. No. “, vbCritical, “Save”
Exit Sub
End If
Call prSave
End Sub
Private Sub prSave()
If binNew = True Then
THows = Worksheets(“Data”).Range(“A1”).CurrentRegion.Rows.Count
With Worksheets(“Data”).Range(“A1″)
.Offset(THows, 0).Value = txtEmpNo.Text
.Offset(THows, 1).Value = txtEmpName.Text
.Offset(THows, 2).Value = txtAddr1.Text
.Offset(THows, 3).Value = txtAddr2.Text
.Offset(THows, 4).Value = txtAddr3.Text
End With
txtEmpNo.Text = ”
txtEmpName.Text = ”
txtAddr1.Text = ”
txtAddr2.Text = ”
txtAddr3.Text = ”
Call PrComboBoxFill
Else
For i = 2 To TRows
If Trim(Worksheets(“Data”).Cells(i, 1).Value) = Trim(ComboBox1.Text) Then
Worksheets(“Data”).Cells(i, 1).Value = txtEmpNo.Text
Worksheets(“Data”).Cells(i, 2).Value = txtEmpName.Text
Worksheets(“Data”).Cells(i, 3).Value = txtAddr1.Text
Worksheets(“Data”).Cells(i, 4).Value = txtAddr2.Text
Worksheets(“Data”).Cells(i, 5).Value = txtAddr3.Text
txtEmpNo.Text = ”
txtEmpName.Text = ”
txtAddr1.Text = ”
txtAddr2.Text = ”
txtAddr3.Text = ”
Exit For
End If
Next i
End If
binNew = False
End Sub
——–
Private Sub cmdsearch_Click()
binNew = False
txtEmpNo.Text = ”
txtEmpName.Text = ”
txtAddr1.Text = ”
txtAddr2.Text = ”
txtAddr3.Text = ”
TRows = Worksheets(“Data”).Range(“A1”).CurrentRegion.Rows.Count
For i = 2 To TRows
If Val(Trim(Worksheets(“Data”).Cells(i, 1).Value)) = Val(Trim(ComboBox1.Text)) Then
txtEmpNo.Text = Worksheets(“Data”).Cells(i, 1).Value
txtEmpName.Text = Worksheets(“Data”).Cells(i, 2).Value
txtAddr1.Text = Worksheets(“Data”).Cells(i, 3).Value
txtAddr2.Text = Worksheets(“Data”).Cells(i, 4).Value
txtAddr3.Text = Worksheets(“Data”).Cells(i, 5).Value
Exit For
End If
Next i
If txtEmpNo.Text = ” Then
Else
CmdSave.Enabled = True
CmdDelete.Enabled = True
End If
End Sub
—————–
Private Sub CmdNew_Click()
binNew = True
txtEmpNo.Text = ”
txtEmpName.Text = ”
txtAddr1.Text = ”
txtAddr2.Text = ”
txtAddr3.Text = ”
CmdClose.Caption = “Cancel”
CmdNew.Enabled = False
CmdSave.Enabled = True
CmdDelete.Enabled = False
End Sub
——————————–